Asteroids Plus 2.0
Asteroids Plus 2.0 - Milestone 17 dynamic background Part 2


This is Part 2 of this article, Link to Part 1 : Part1
...
If you recall, each star object in the particle system had a R property, and a position property(x,y) associated with it.
Canvas and Pixel Manipulation
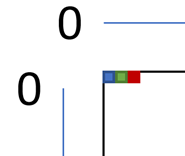
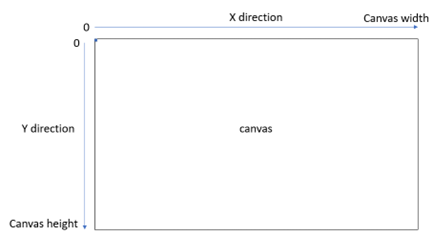
A canvas is a rectangle with a width and height. The canvas has ‘pixels’ which represents the smallest unit that can be drawn to the screen.
Each pixel starts on the left and moves to the right of the canvas, and then wraps back around to the left of the canvas and down a line. The canvas object in HTML has an image data buffer which give absolute control of every pixel drawn to the canvas, and that’s what we are going to use to draw the stars. This is where it gets interesting. Each Pixel is represented in the image data array by four bytes. The first byte is red, the second byte is green, the third byte is blue, and finally the fourth byte is alpha. Alpha is a representation of opacity, so you can make each pixel varying levels of opacity.
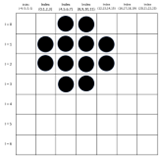
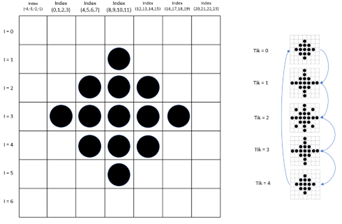
For me to clearly understand how I was drawing each star, I created pixel maps for the larger ones. The 1px and 2px radii stars are straightforward.
Keep in mind that the 5px star has a twinkle animation that I will cover later. If you look closely at my map, I not only am managing the pixel positions that I’m drawing to, but also the array indices associated with each pixel. Those array indices are how I can control color to each of the stars.
Let’s reset a bit. Each star object has a position (x,y) property, and that designates the pixel that I want the start to be located at in the canvas. The R, or radius, property is how I determine how I draw each pixel of that star. The star maps let me correlate a relative position of each array index to that pixel location. Now I’m now going to putt ALL the code here, because… it’s a lot. But I will show the general principle by posting the 1px and 2px radius star code. I just use a switch statement based on the r property of each star object.
I generated an algorithm the iterates through the image data array based on the size of the canvas width, because that is how you navigate to the ‘y’ dimension of the canvas, and how big the star is (r).
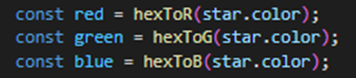
This prevents me from having to write a line of code for each image data array index… which would be a ton of code period. As the stars get bigger, there are more indices that need to be accounted for, and it gets a little murky. But this demonstrates the general principle. Take note that each ‘bank’ of four array indices is accounted for by writing red, green, blue, and alpha. I have a list of colors that I’m using for stars that I use chroma to dictate and I use a hex to RGB conversion utility method to convert into RGB values to make this easier.
Animations in Canvas
There are three aspects that get animated in this dynamic background…. Star positions, star twinkling (big and small), and the galaxies (position and rotation).
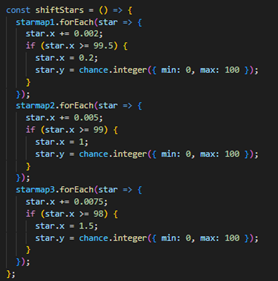
The star positions are managed by a method called shiftStars() in the RAF update method. When triggered, I loop through all three star layers and adjust their x position a VERY small amount.
This is also where I detect if the star is leaving the screen, and I randomly redraw each star somewhere on the left side of the screen. This method animates the star movements because they are completely redrawn every RAF update redraw step.
The twinkle in each star is managed during the drawing routine of the stars. Each star has properties that are coupled to the animations. Radius 5px stars have the optional isAnimated property set as well.
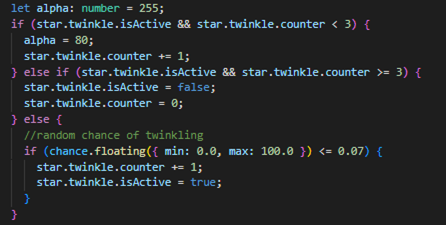
For the overall opacity twinkle, shown above is the logic. I have a Boolean twinkle isActive flag that dictates if the current star is within a twinkle cycle. If it isn’t, the star has a random chance of starting to twinkle. All my randomness in my project uses Chance.js library, its so simple and I love it for the different random value methods it has natively.
If the star IS in a twinkle animation, I reduce the star objects alpha value to 80 (out of 255). This makes the star temporarily more ‘transparent’ and gives the twinkling effect. I also start the stars twinkle counter for each update. And when it is equal to 3 updates, I reset the counter and set the Boolean back to false, starting the process over.
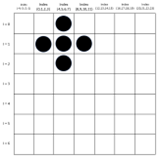
The radius 5px stars have a separate method of animation, not only can its opacity be animated, but I change the shape of the star itself, demonstrated by the animation sequence listed below.
This is controlled in the drawStar method. It is triggered in a similar pattern as the opacity twinkling.
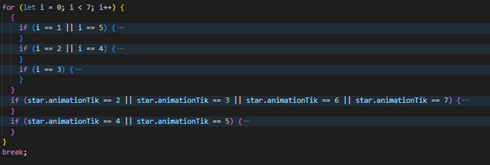
There is an animation tik, a enable Boolean, and a probability based trigger to start the sequence. Instead of simply changing the opacity for a duration, I use the Tik as the method of controlling the draw sequence. I parse out what indices are draw during each sequence, as many are ‘common’ between the different sequences. I’m not posting how I’m setting each array bundle, we’ve covered that, but this is the general approach to managing how to draw based on each sequence and Tik.
For each loop through the drawing sequence, depending on the tik and the step, I’m drawing different aspects of the star.
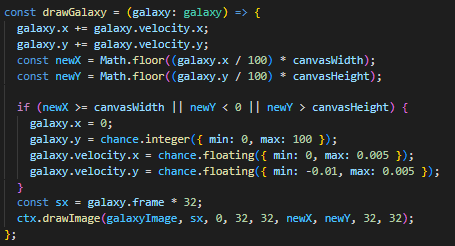
The FINAL aspect of animations, and this whole entry is the drawing of the galaxies onto the canvas. HTML Canvas context has a drawImage() method that let’s you draw an image file that’s loaded into your project to a spot in canvas with a specific size. I’m drawing the galaxy spritesheet earlier shown, at the galaxy objects position, but using a sprite sheet has two small aspects to it. I’m not drawing the entire spritesheet, just a portion of it, and the drawImage() method has parameters the essentially let you crop a portion of the source image. This is how galaxies spin in my background, I track an animation tik, and based on that interval, I crop the spritesheet differently. So the logic below shows the position management and the cropping logic for the drawImage method().
That’s a huge devlog entry. But this is a large feature, and it took while to get sorted out. The final detail I’ll mention now is since this dynamic background uses a RAF loop, I refactored my game to use that same RAF loop to trigger the peasy-ui updates.
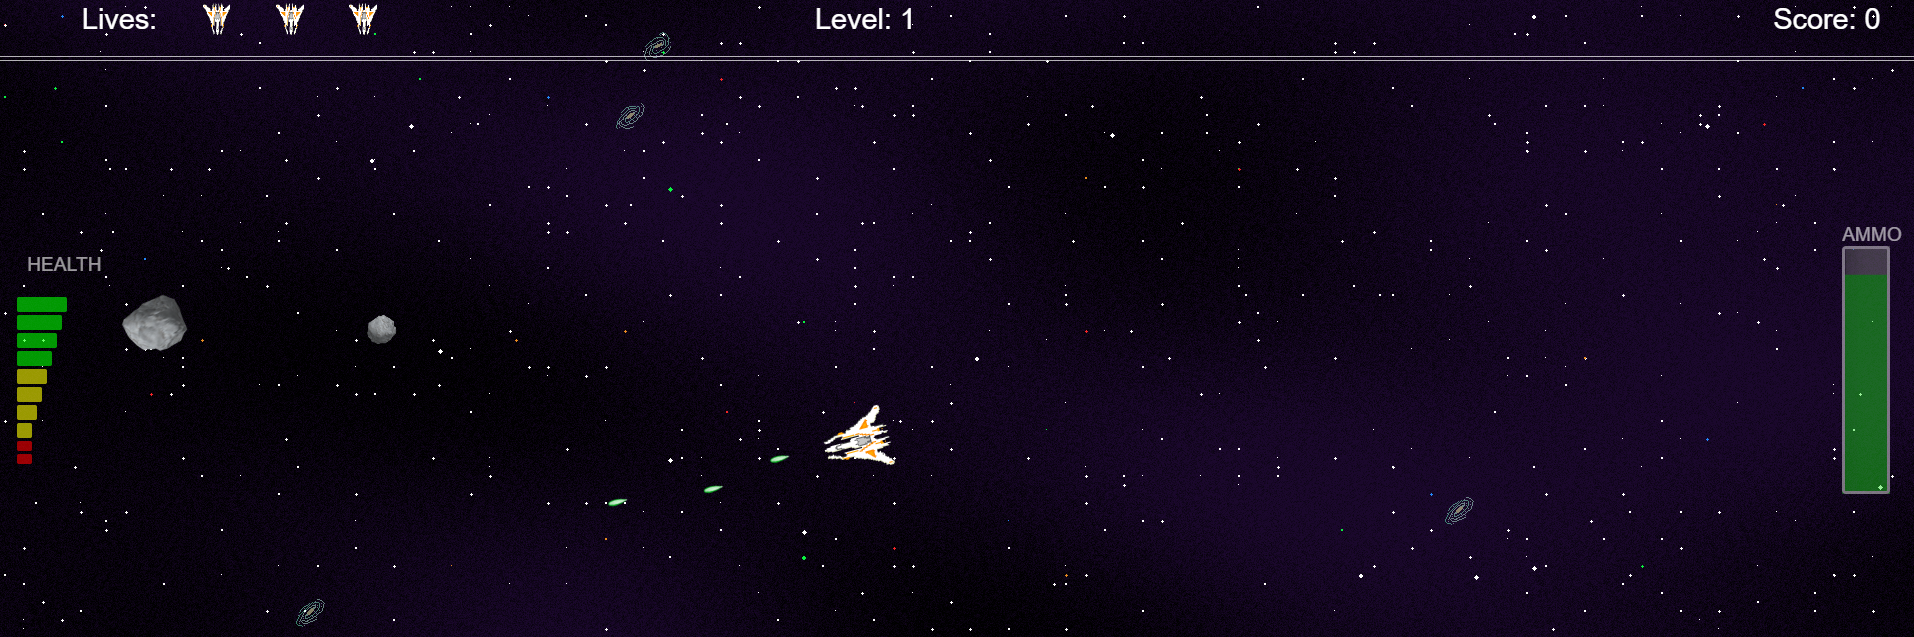
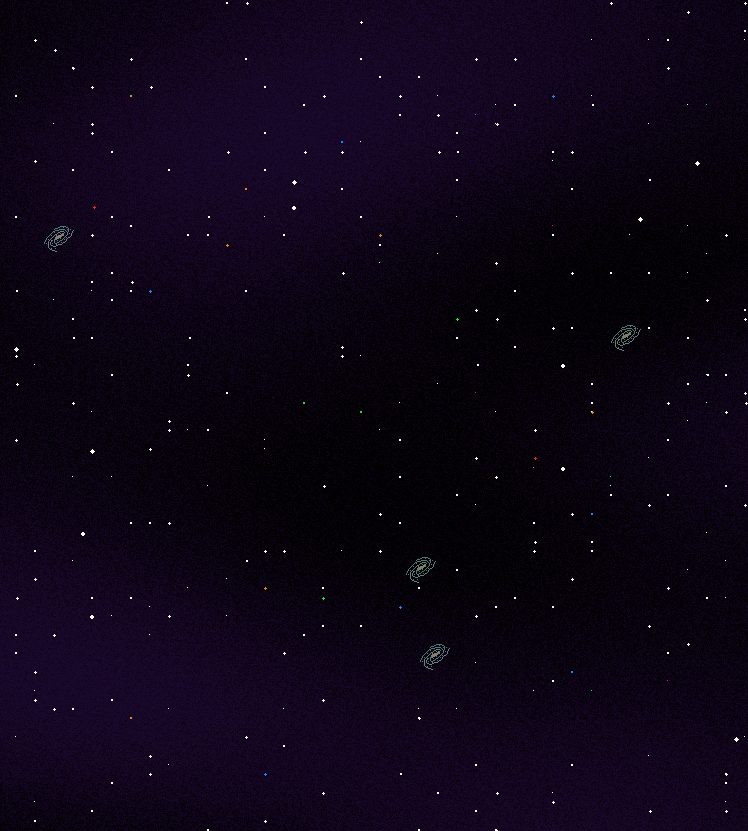
Author's post note: someone suggested that i add a sample of what the background will look like... i'm not sure why i didn't think of that myself..
So here's a sample of how the game looks.
This currently hosted game site: https://mookie4242.itch.io/asteroids-plus-20
Twitter: @jyoung424242
SlideShare: https://www.slideshare.net/JustinYoung3/next-gen-asteroids
GitHub: https://t.co/utxHxXKdOz
Leave a comment
Log in with itch.io to leave a comment.